Related Resources: manufacturing
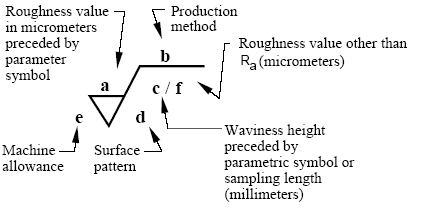
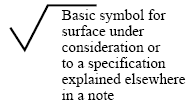
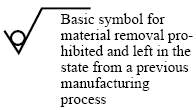
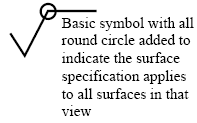
ISO Surface Roughness Symbols Terminology
Manufacturing & Specification
Surface Roughness Review
The principal ISO standard that specifies surface roughness is ISO 1302 and defines the surface roughness symbology and additional requirements for engineering drawings. The details in ISO surface finish standards relate to surfaces produced by abrading, casting, coating, cutting, etching, plastic deformation, sintering, wear, erosion, and some other methods.
Other ISO Standards Related To Surface Roughness
ISO 468:1982 “Surface roughness — parameters. Their values and general rules for specifying requirements.”
ISO 4287:1997 “Surface texture: Profile method — Terms, definitions and surface texture parameters.”
ISO 4288:1996 “Surface texture: Profile method — Rules and procedures for the assessment of surface texture.” Includes specifications for precision reference specimens, and roughness comparison specimens, and establishes requirements for stylus-type instruments.”
ISO 8785:1998 “Surface imperfections — Terms, definitions and parameters.”
ISO 10135-1:CD “Representation of parts produced by shaping processes — Part 1: Molded parts.”
 |
 |
 |
|
 |
|
 |
ISO Surface Parameter Symbols
Rp =max height profile
Rv =max profile valley depth
Rz* =max height of the profile
Rc =mean height of profile
Rt =total height of the profile
Ra =arithmetic mean deviation of the profile
Rq =root mean square deviation of the profile
Rsk =skewness of the profile
Rku =kurtosis of the profile
RSm =mean width of the profile
R∆q =root mean square slope of the profile
Rmr =material ration of the profile
Rδc =profile section height difference
Ip = sampling length – primary profile
lw = sampling length – waviness profile
lr = sampling length – roughness profile
ln =evaluation length
Z(x) = ordinate value
dZ /dX = local slope
Zp = profile peak height
Zv = profile valley depth
Zt = profile element height
Xs = profile element width
Ml =material length of profile