Related Resources: manufacturing
How to use a Surface Roughness Comparator
Surface Roughness Review
Surface Roughness Conversion Chart
Manufacturing Engineering Processes
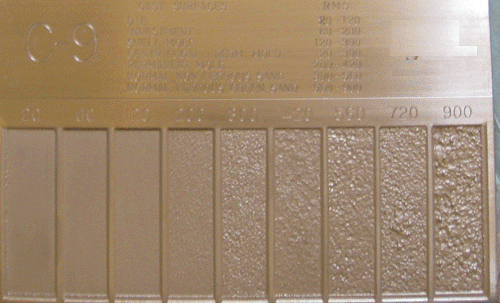
Surface roughness comparators are used within industry to measure or verify the as-manufactured surface finish (roughness) of a part or assembly. Comparators are selected and used based on the manufacturing process used to create a particular surface finish. Industry standard manufacturing specific roughness comparators are available for the following processes:
Casting
Conventional Machining
Cylindrical Ground
Surface Turned
Electrical Discharge Machining EDM
Shot Blast
Grit Blast
 |
| Typical Casting Surface Roughness Comparator |
Using a Surface Roughness (Finish) Comparator
- Place the roughness scale next to the work piece.
- Slide the various scales next to each other so that the comparator scale area is adjacent to the surface you are measuring.
- Compare by drawing your fingernail across each surface at right angles to the tool marks.
- When the feel at the finger nail contact is the same or close then the finish (roughness) is identical.
- If an exact match cannot be found then the measured surface roughness is reported as the next higher roughness comparator scale.